


Introduction
This guide shows you what is required to get your very own wreckfest 2 dedicated server up and running. Not too much is known about wreckfest 2 right now due to just being released and i will update this guide as more is known. If you see any errors, please let me know and i will update them here in the guide.
Installation of Wreckfest 2 Server files
The first step is to retrieve the files for the game, this is done via SteamCMD.
Follow the guide here on how to use STEAMCMD.
Download SteamCMD for Windows
Once you have STEAMCMD, run the following command:
steamcmd +login USERNAME PASSWORD +force_install_dir C:\wreckfest2server +app_update 3519390 validate +exit
Where it says USERNAME – Input your steam username and where it says PASSWORD input your steam password. At current they are requiring you to provide your login to download the wreckfest server client ( Which sucks and should not be a requirement )
Note: You can adjust the +force_install_dir parameter to the directory you want to download the server to.
This will then download the entire game, Once completed, it’s time to setup the server configuration.
Server Configuration – Commandline
In this section we define the options on configuration and some basic commandline parameters
The best method for a self-hosted solution is to use the provided .batch file
Inside wreckfest2server\ folder where you downloaded the game files, create a bat file e.g. start.bat
Inside the .bat file enter in this:
start /high --server --save-dir=C:\wreckfest2server\
Note: As prior stated, change the save directory to where your save files are, this is where it will read a config file.
All parameters appear to be only able to be set inside the server_config.scnf file instead of commandline.
In this file you will want to Change parameters as required e.g.Change the port to the ports you want to use ( You will have to portforward/open them )
Change name to what you want your server name to be.
Change password to what you want.
I will include the template in the next section for ease of use.
Server Configuration – Configuration file
Note: The file is not generated automatically until you run the server and run the save command in the console, for the sake of skipping that, here is the configuration file template below.
Change where it says “Name” to the server name you want. Change “description” to what you want to display and change the “game port” to the port you want to use, this should be added to your firewall to be accessible ( see port forwarding advise )
You can also increase the bot default count ( see it below, the default is 8 )
{
     "bbmeta": "scnf v0 n1",
     "net server config": [
         {
             "bbmeta": "ncnf v0 n1",
             "name": "GameKnightly Wreckfest 2 Server",
             "description": "Welcome to my server hosted by Game Knightly",
             "game port": 40000
         }
     ],
     "game server config": [
         {
             "bbmeta": "gcnf v0 n1",
             "event rotation name": "",
             "default event": [
                 {
                     "bbmeta": "ecnf v0 n1",
                     "level": [
                         {
                             "bbmeta": "mlvl v1 n1",
                             "level id": "track07_1",
                             "weather path": "data/property/weather/track07_1_bluesky_2.weat",
                             "ai set path": "career/ai-class-all.aist",
                             "game mode id": "bangerrace"
                         }
                     ],
                     "rules": [
                         {
                             "bbmeta": "evru v4 n1",
                             "laps": 3,
                             "time limit": 3,
                             "number of teams": 2,
                             "max number of participants": 24,
                             "flags": "",
                             "car reset delay (seconds)": 5,
                             "vehicle damage id": "normal"
                         }
                     ],
                     "bot count": 8
                 }
             ],
             "countdown time": 100000,
             "flags": "leader enabled"
         }
     ]
 }
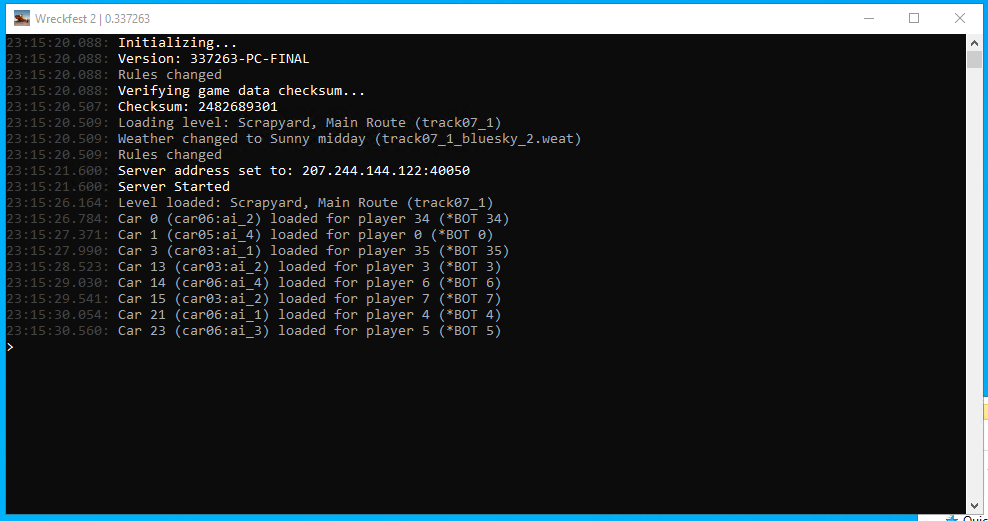
Running the server
Please note some port-forwarding may be required, by default the server will use port 30100, each server should use unique ports and runs a separate process. You should unblock these port in your firewall\router.
If setting up your own server is too much work for you, then please consider renting a server from Citadel Servers – They setup everything for you and offer over 20 locations worldwide, i would highly recommend them


